Description
Thus far, I have created many game-ready assets and got pretty comfortable with that process. Now, it was time to actually put one in a game!
Initial idea
The idea for this project came to me after watching this video on how a certain boss in Cyberunk 2077’s Phantom Liberty DLC was built. In that video, it was mentioned that the Chimera was originally supposed to be a manned tank, and I started wondering: “if that were the case, how would the crew inside be equipped? What kind of weapons would they have?” And as a big fan of Yinglong, it didn’t take me long to ask myself: “what if they had that, but smaller?”
I started by choosing an existing weapon, the Tsunami Kappa, as a base. Thanks to this, I was able to use an existing set of weapon stats and only modify it slightly where needed, as well as make use of the animations already made for the Kappa. The downside of the latter was that I needed to design my weapon with Kappa’s dimensions in mind, in order to avoid clipping etc.
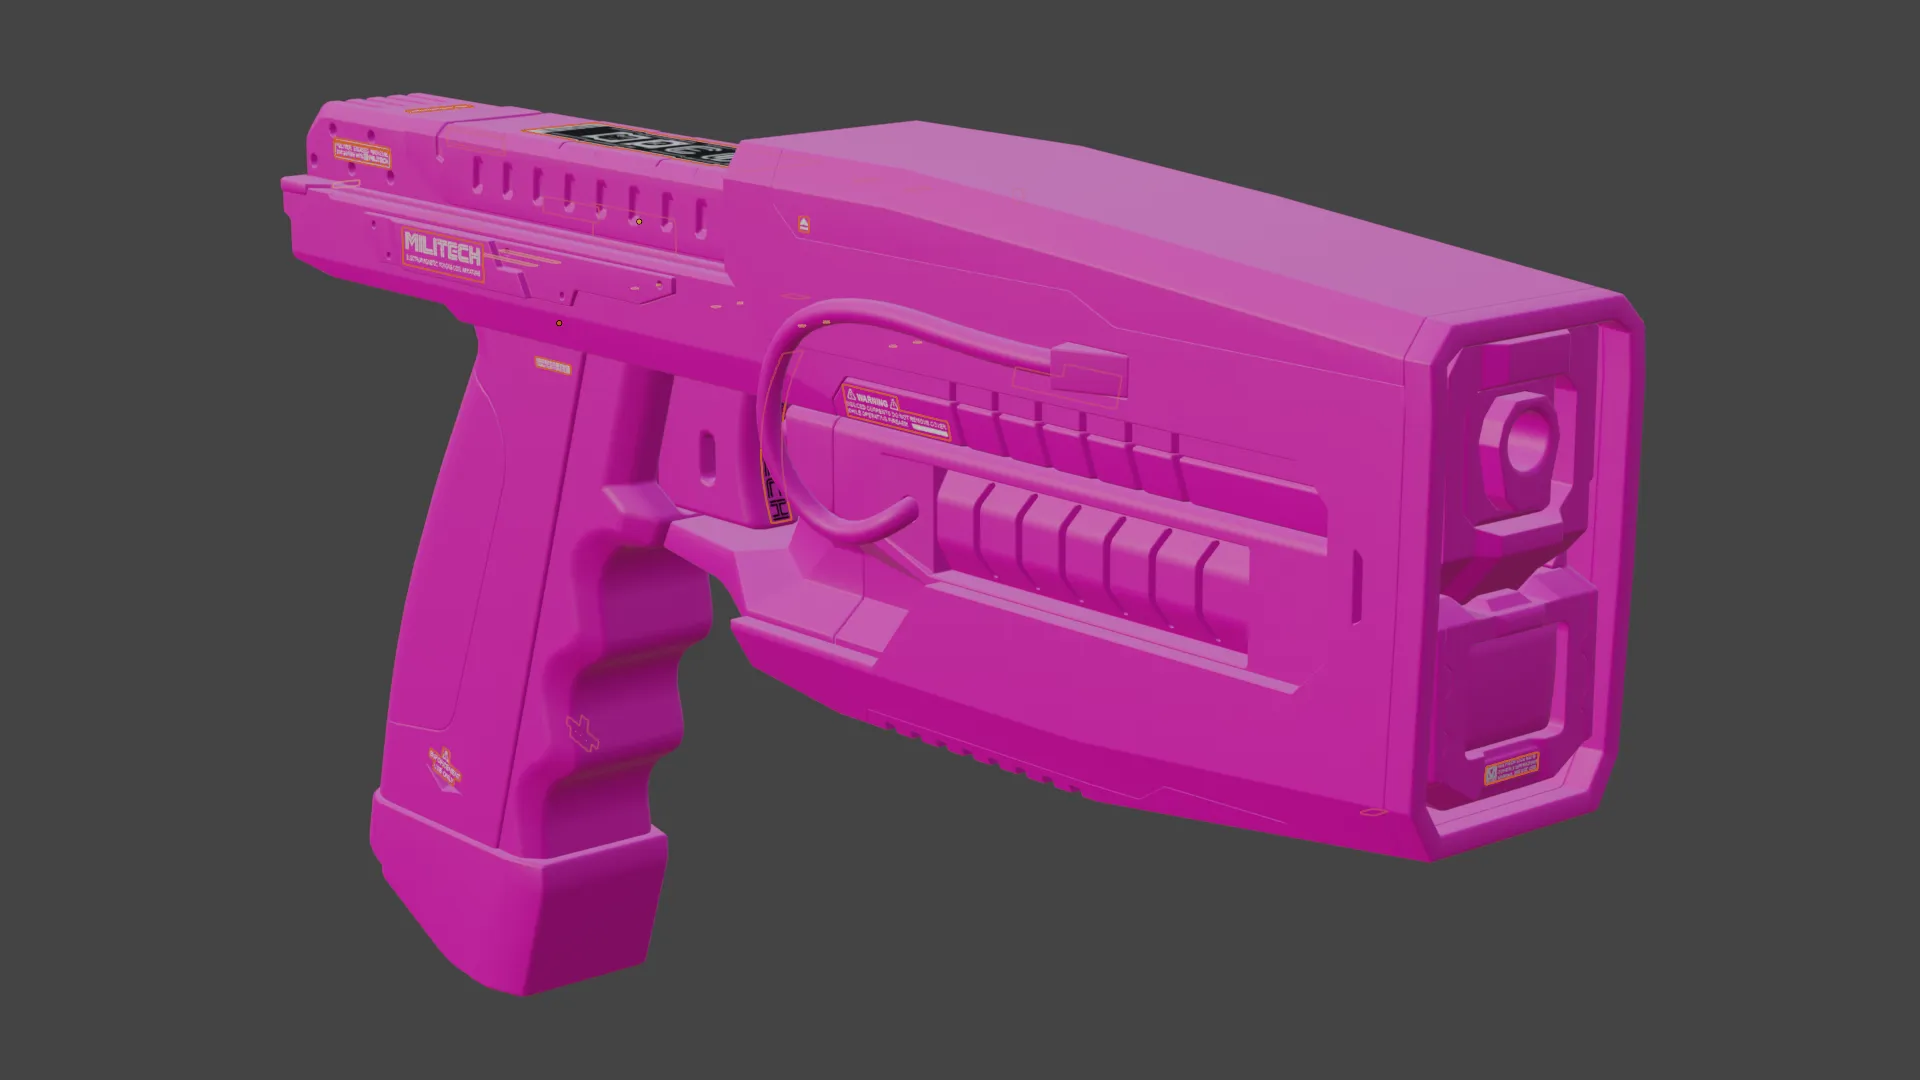
With the above in mind, I then thought up a compact smart handgun complete with a name, description and a bit of lore on it, which you can read on the mod’s page on Nexusmods. This is what the finished weapon looks like:
End result
The Stinger is comprised of 26 648 triangles in total, which I think is a good score. My goal was to achieve a detailed result with a fairly conservative amount of geometry, and seeing how it stacks up to other weapons in the game, I believe that goal has been met. A comparison with the Kappa awaits you below:
| Weapon name | Body tri count | Mag tri count | Total |
|---|---|---|---|
| Militech Stinger | 22 107 | 4 541 | 26 648 |
| Tsunami Kappa | 23 751 | 7 344 | 31 095 |
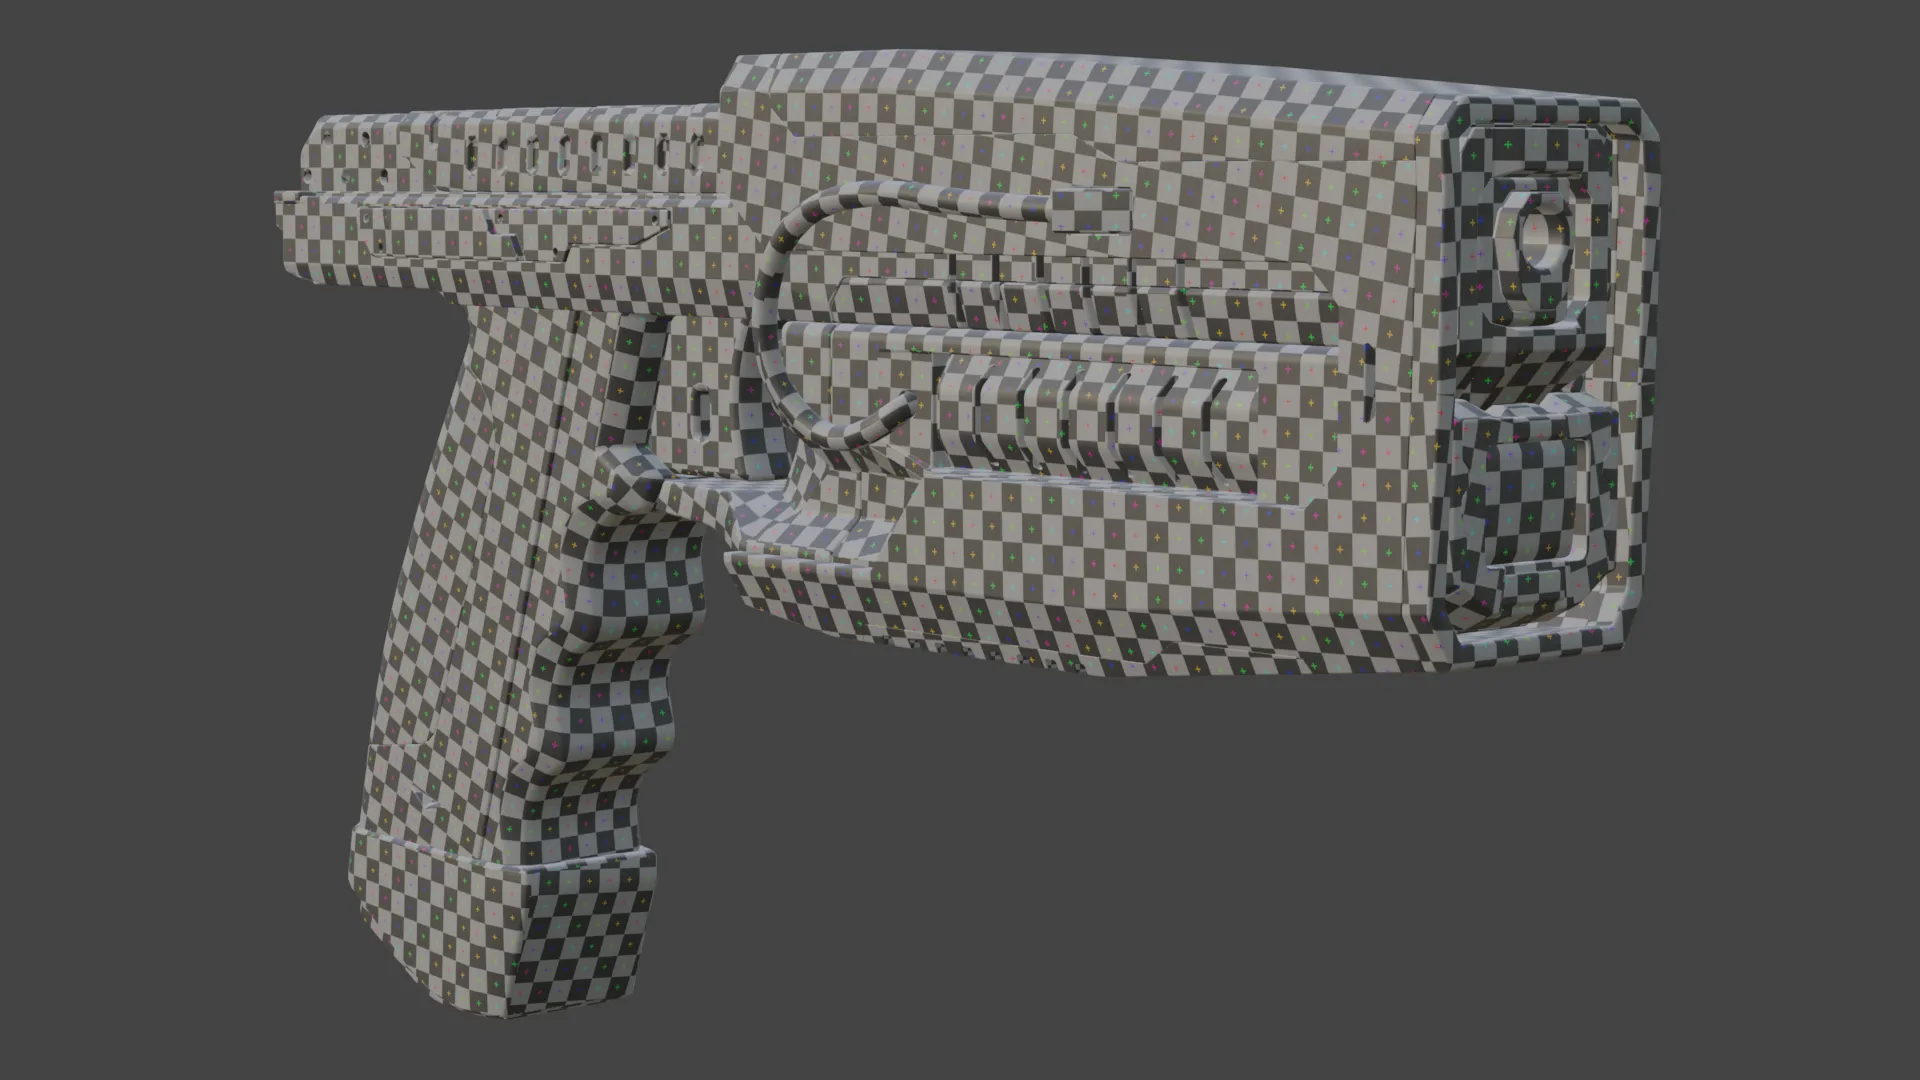
UV-wise, this is the end result - as you can see, there is very little stretching:
…and geometry-wise, the model looks like this:
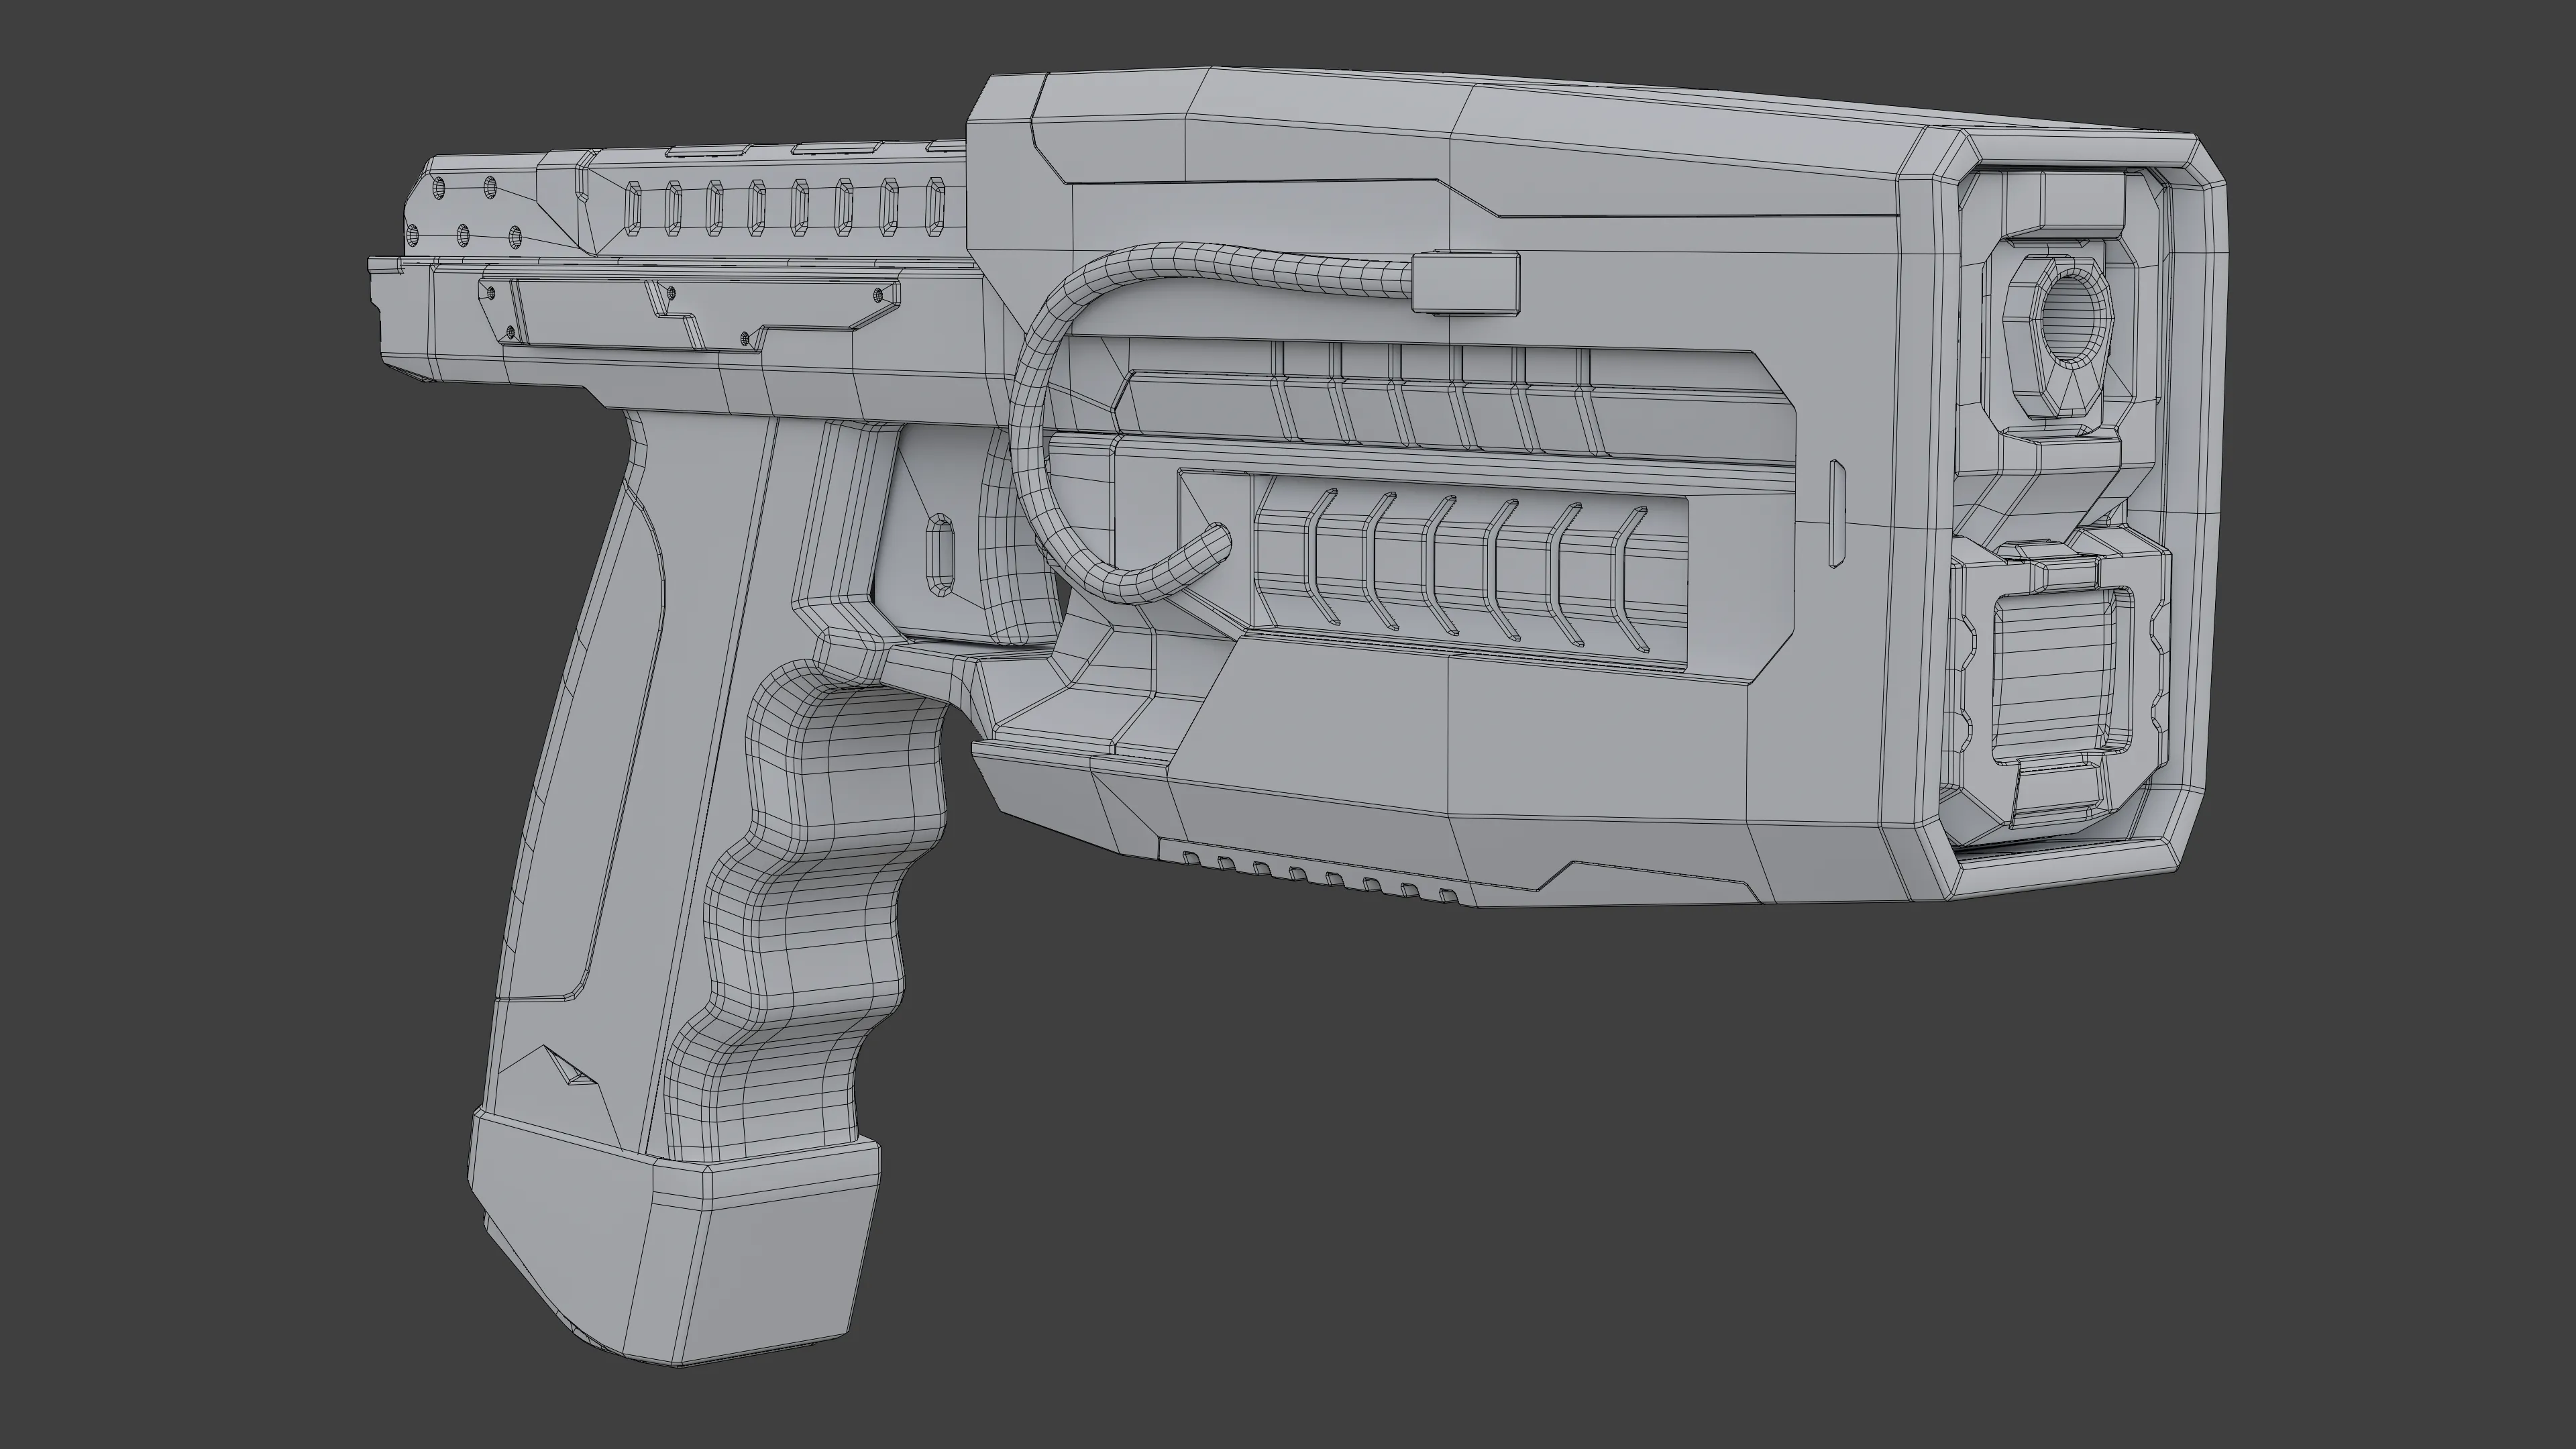
Due to me using a boolean workflow (more on that below), the geometry here is rather messy and far from ideal quad geo (for a better example of good topology, you can take a look here). However, for a non-deforming hard surface object, as long as the shading is fine, I decided this was okay.
New tools, new problems, new lessons
Manned tank idea aside, another motivation for this project was to learn boolean modeling workflow using the HardOps and BoxCutter blender addons. I made an initial test run with another project that allowed me to learn the tools a little, and thought I’m good to go. However, that may not have been true entirely:
Lesson no. 1: shading is hard when you’re taking shortcuts. Historically, I was able to fix or at the very least mask a lot of such shading mishaps using weighted normals, retopologizing parts of the model and/or some strategically placed loops, but this one just would. Not. Budge. Frustrated, I ended up leaving it in initially (thankfully, it was barely visible in the game - but still was).
Fast forward a little later however, and I stumbled upon this little gem of a video by Josh Gambrell from BlenderBros. I was sceptical - could this really fix all those issues I was facing with shading? But, lo and behold, it did:
Lesson no. 2: blender modifiers rule. Take that, shading! Naturally, I would not have such issues with proper quad topology, but it was also interesting to learn how to fix such problems should the topology be anything different that proper.
Rest of the project
Since this is a mod, I have also used community-made modding tools created specifically for Cyberpunk 2077 - Wolvenkit for editing game files, and MLSetupBuilder for editing material setups (i.e. using existing in-game materials for texturing). I did need some help in figuring out how to add my own custom model and stats through those tools on top of what the game offers, but overall, both programs worked surprisingly well.
For MLSetupBuilder, I have also created material masks for certain parts of the model in Substance 3D Painter, using a white layer with a black mask for each. This was a pretty straightforward process, especially with the use of the Polygon Fill tool - very helpful.
Finally, I created separate meshes for decals, to add some additional flavor to the model and the magazine:
These use the existing in-game decal atlases and allowed me to set up main weapon materials without worrying about decal placement in relation to the gun’s UVs.
Summary
This was a long journey, but I’ve learned a lot - a new workflow, new tools, and valuable lessons regarding shading. The end result may not exactly look connected to the Chimera as originally intended, especially with the final color scheme, but I feel that it at the very least manages to fit well into the world of Cyberpunk 2077, and that is good enough for me for the time being.
Tools used
- blender with the Hopscutter addon bundle - for modeling and inventory icon rendering
- Adobe Substance 3D Painter - for initial texturing exploration and material masks
- Wolvenkit and MLSetupBuilder - for editing game files and material setups
- Photopea - for creating the weapon’s HUD icon